EAP-TLS Certificates for Wireless on Android
In this tutorial I want to demonstrate to you how to install a user certificate on an Android device so that you can authenticate to a wireless network using EAP-TLS. This is the most secure method of authentication when it comes to wireless networks but it requires some more effort as you require certificates on the server and each client device.
If you don’t have a RADIUS server and Certificate Authority yet then you should take a look at my PEAP and EAP-TLS on Windows Server 2008 tutorial. In this tutorial I will be using a Windows Server 2008 machine running Certificate Services to generate a client certificate for my Android device.
There are three devices that we require for this tutorial:
- Android Device: I’m using my Samsung Galaxy S3 running Android 4.x
- Certificate Authority: required to generate the user certificate. I’m using Windows Server 2008 R2.
- Windows computer: Used to request the user certificate for the Android device. I will be using Windows 7 in my example.
And there are two certificates that we require:
- User certificate.
- Root CA certificate.
The user certificate is required to authenticate the user, the root CA certificate is required in case you created your own certificate authority. We’ll start with the creation of a user certificate.
Generate User Certificate on Windows 7
First we will generate a user certificate for the Android device. I will use Windows 7 to connect to the Certificate Authority and request a user certificate. I will use Web enrollment for this as it’s probably the most convenient method of enrolling user certificates.
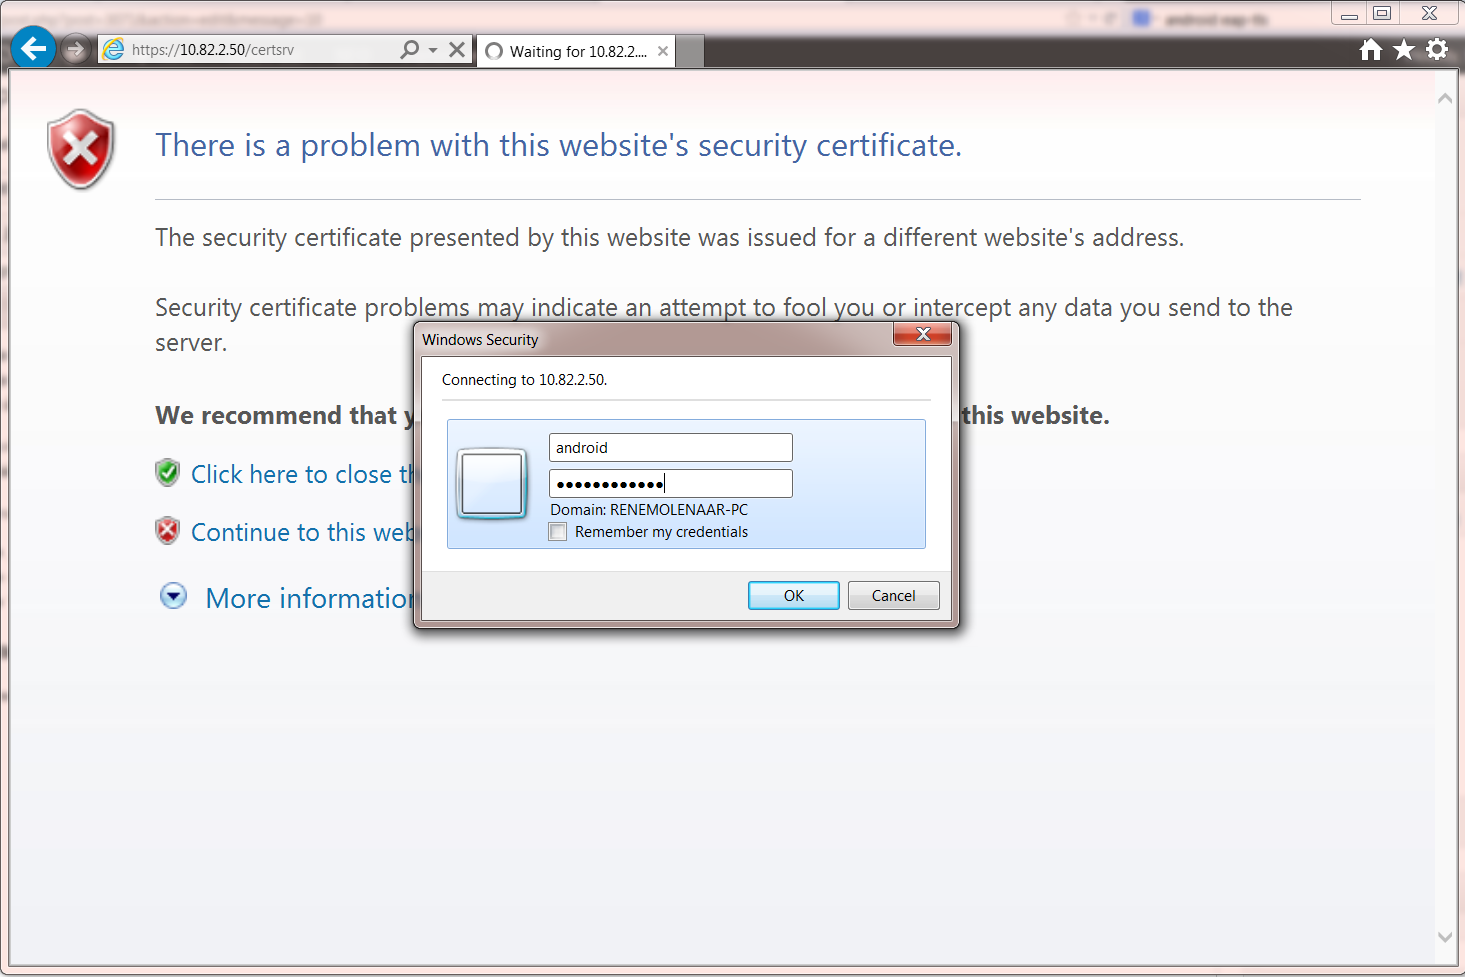
Open the web browser and open http://your-server-ip/certsrv. Enter the credentials of the user account that requires a certificate. I’m doing this for a user called “Android”.
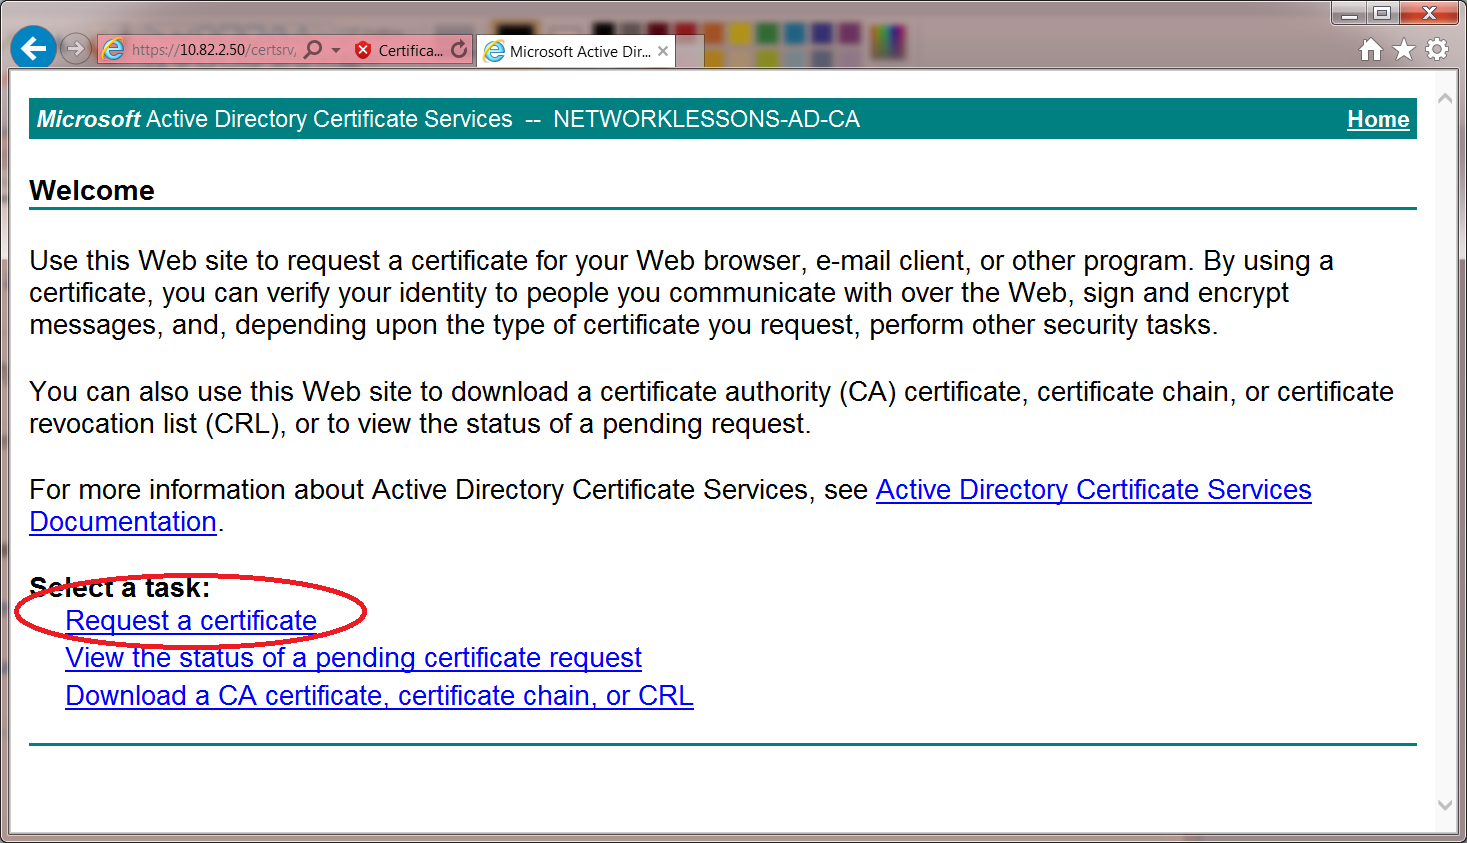
Click on the request a certificate button to continue.
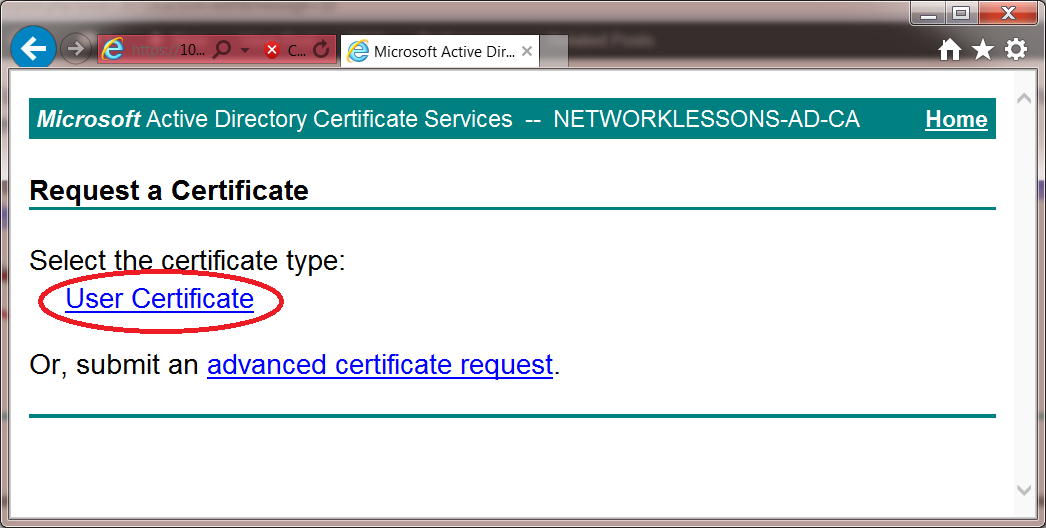
There is no need for advanced options, click on user certificate to continue.
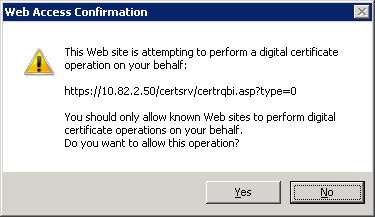
Your web browser will warn you that you are about to request a certificate, just click on Yes to continue.
In the final screen the web enrollment is ready to submit your request. Hit the submit button to continue.
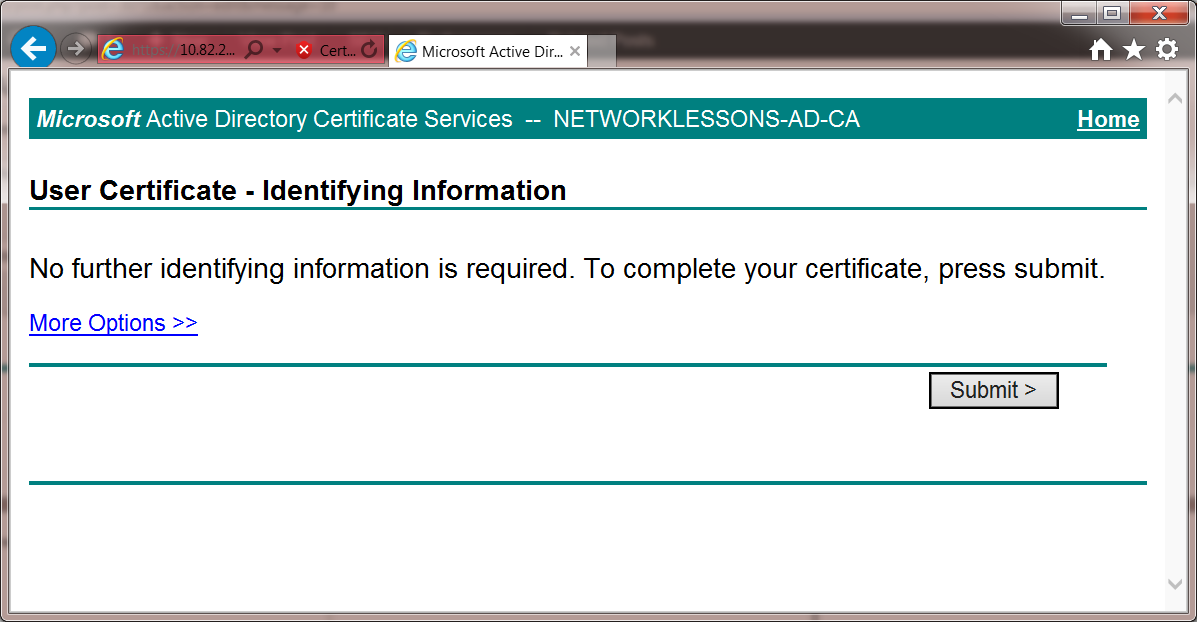
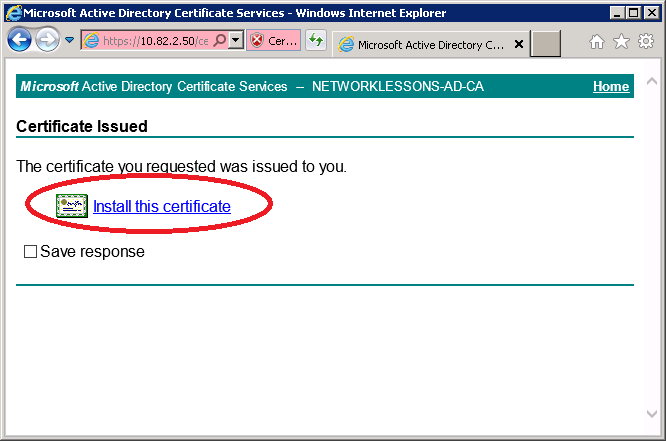
Your user certificate will be ready and the web browser will ask if it should install the user certificate for you. Click on Install this Certificate to continue.
If everything went OK you should get a message that the user certificate has been installed.
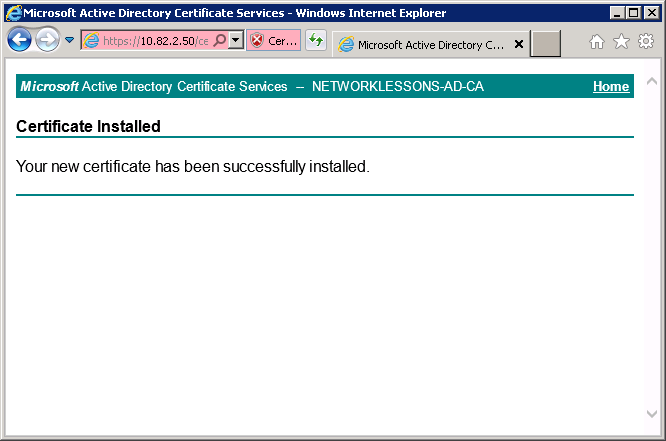
Now we have a user certificate on our Windows 7 computer. We will export this user certificate and import it to our Android device.
Export Certificates
Our Android device will require the user certificate that we just generated but also the root CA certificate in case you are running your own Certificate Authority. I will use my Windows 7 computer to export both certificates. We’ll start with the user certificate…
Export User Certificate
We will use the certificate manager on Windows 7 to view our certificates and export them.
Click on Start > type “CERTMGR.MSC” (without the quotes) and hit enter.
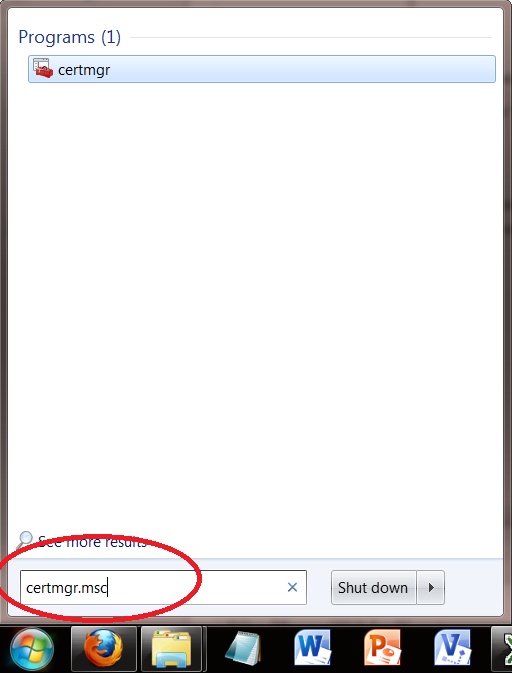
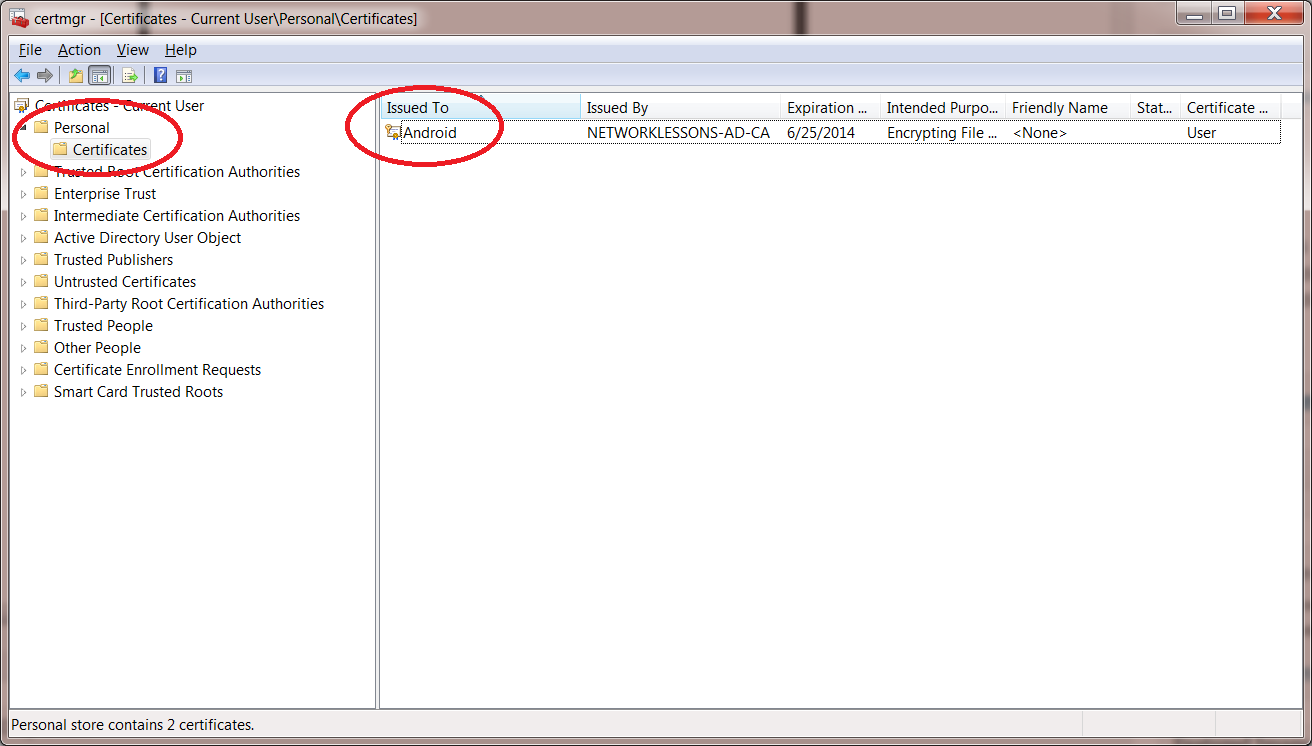
The Certificate manager will start. Click on Personal > Certificates and you will see the user certificate that we generated for the Android user.
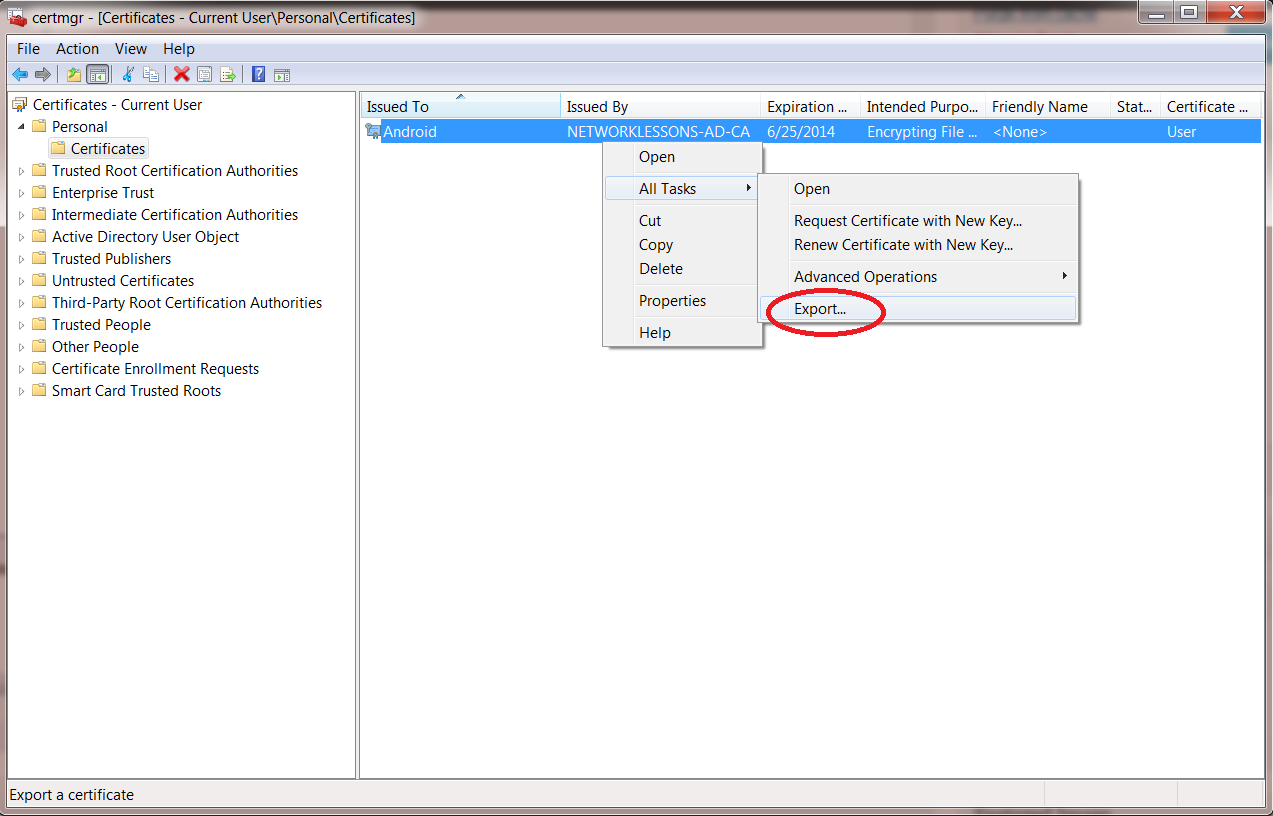
Click on the Android user certificate (right mouse click) and select Export.
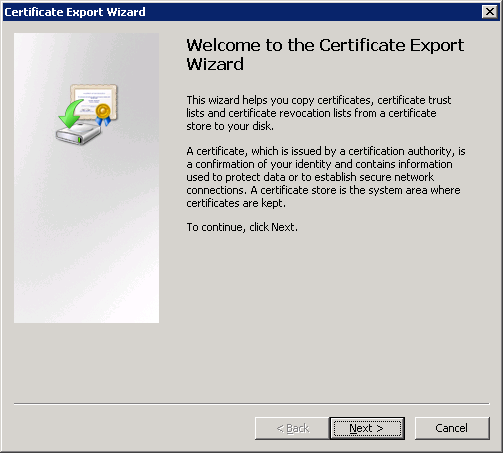
You will see the certificate export wizard, click Next to continue.
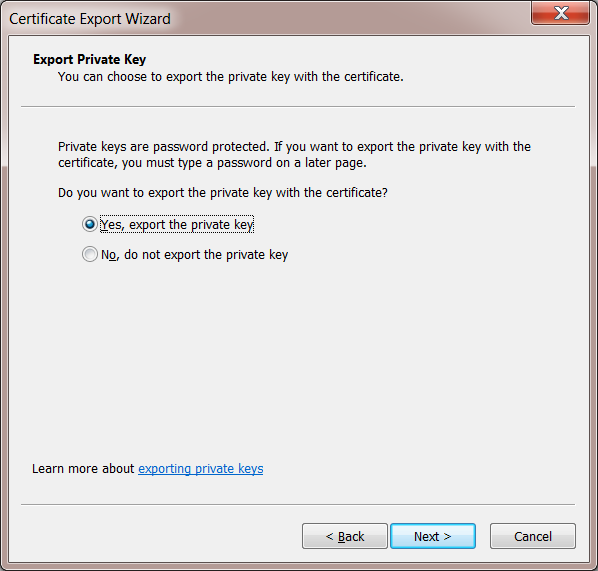
The wizard will ask you to export the private key for the user certificate. Select Yes, export the private key and click Next to continue.
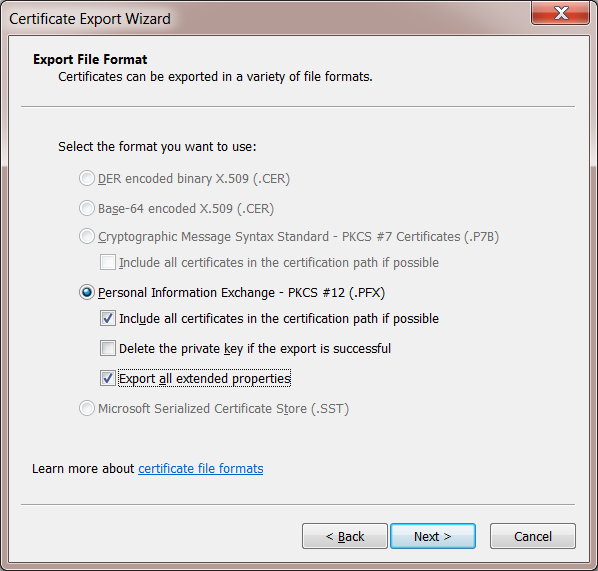
In the next screen you will have to choose the file format. Everything is greyed out since this is a user certificate. Make sure you select the “Include all certificates in the certification path if possible” and “Export all extended properties” checkboxes. Click Next to continue.
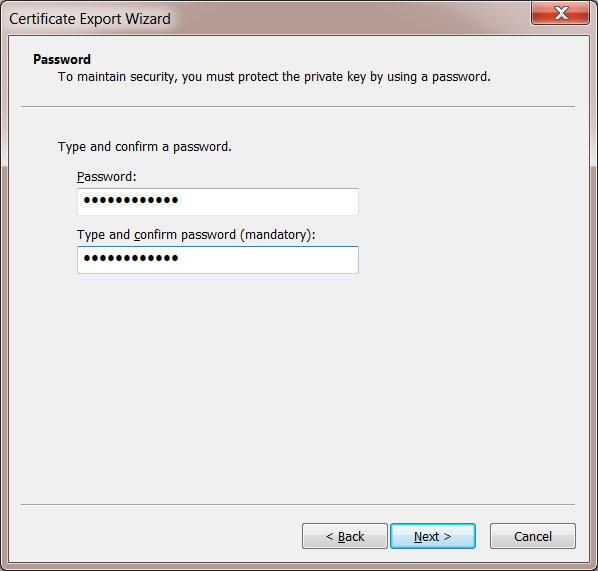
The export wizard will ask you to protect the private key with a password. This is a good idea so make up a secure password and enter it. Click Next to continue.
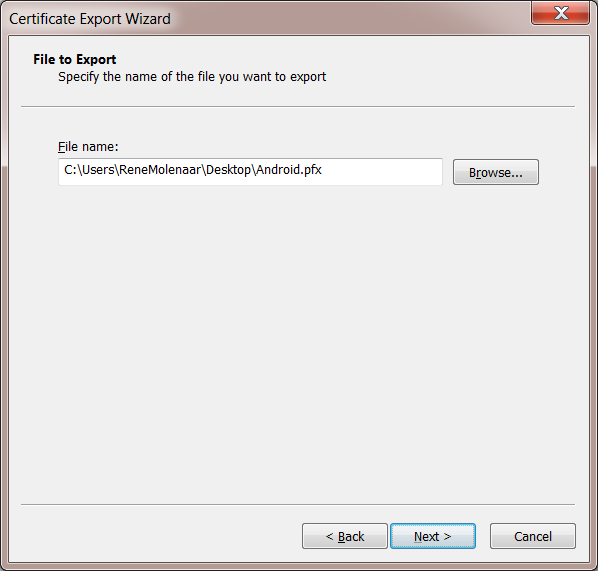
The export wizard will ask you for a filename. I’ll name my user certificate “Android”. Click Next to continue.
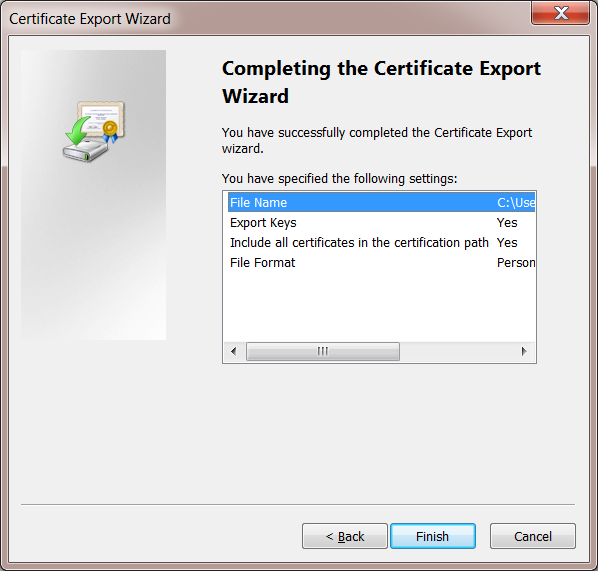
Finally the export is done. Click Finish to continue.
Now we have the user certificate for user Android stored in a file. We still will need the root CA certificate…
Export Root CA Certificate
If you don’t have the root CA certificate yet you will have to export it from the certificate authority or from your Windows 7 computer. I already covered how to export the root CA in my other tutorial for installing PEAP and EAP-TLS on Windows Server 2008. Take a look at the Configure Wireless Client section to see how you can export the root CA to a filename.
Once you are done you should have two files:
- The user certificate in PFX file format.
- The root CA certificate in DER file format.
We are now ready to import the certificates on our Android device.
Import Certificates on Android Device
Most Android devices will only import certificates from an SD card (internal or external). I am using a Samsung Galaxy S3 running Android 4.x but importing the certificates should be similar on other Android 4.x devices.
Some older Android versions might only recognize certain file formats. If your certificate are not recognized, try renaming the “cer” files to “crt” and the “pfx” file to “p12″.
First you need to copy the two certificate files to your Android device. In my case I had to copy it to the internal storage but it’s possible that you need to copy it to an external SD card on other Android devices. Whatever storage “device” it is, you need to copy the files to the root…don’t use any sub-folders. Here’s an example of where I stored the certificate files on my Samsung Galaxy S3:
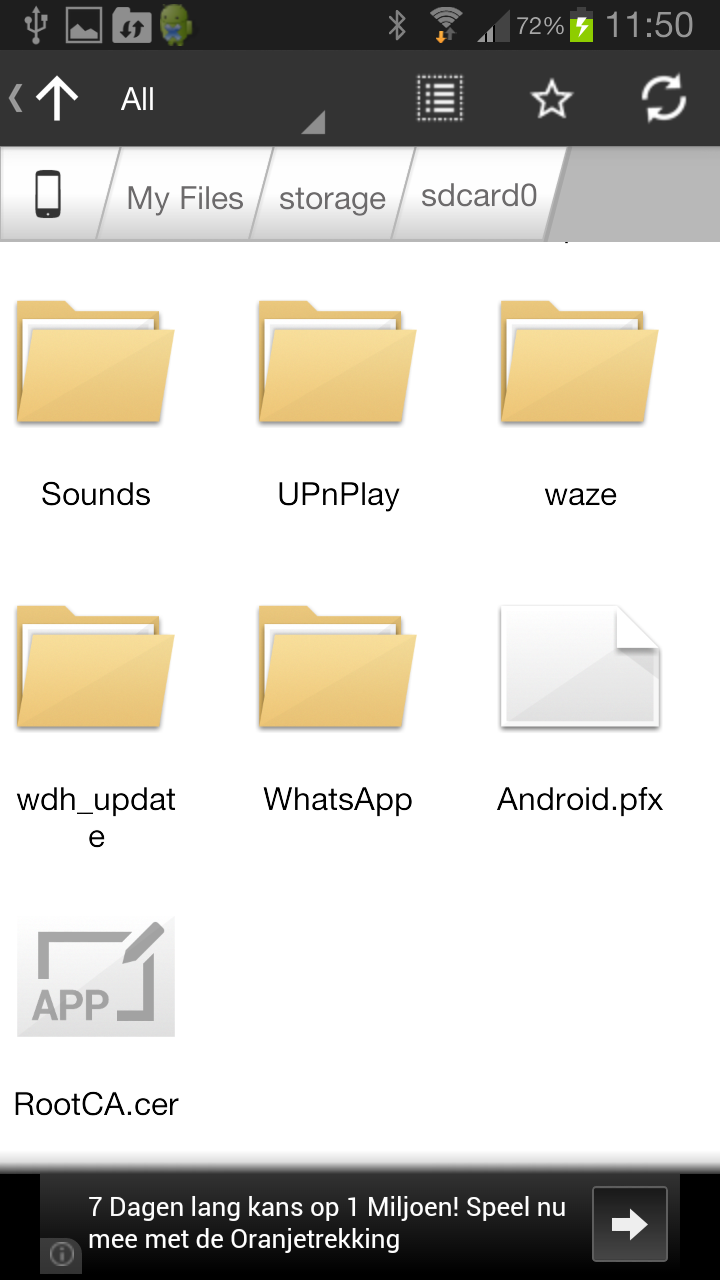
Above you can see that I stored the following two files on sdcard0 (despite the name, this is the internal storage of the phone):
- Android.pfx (user certificate).
- RootCA.cer (root CA certificate).
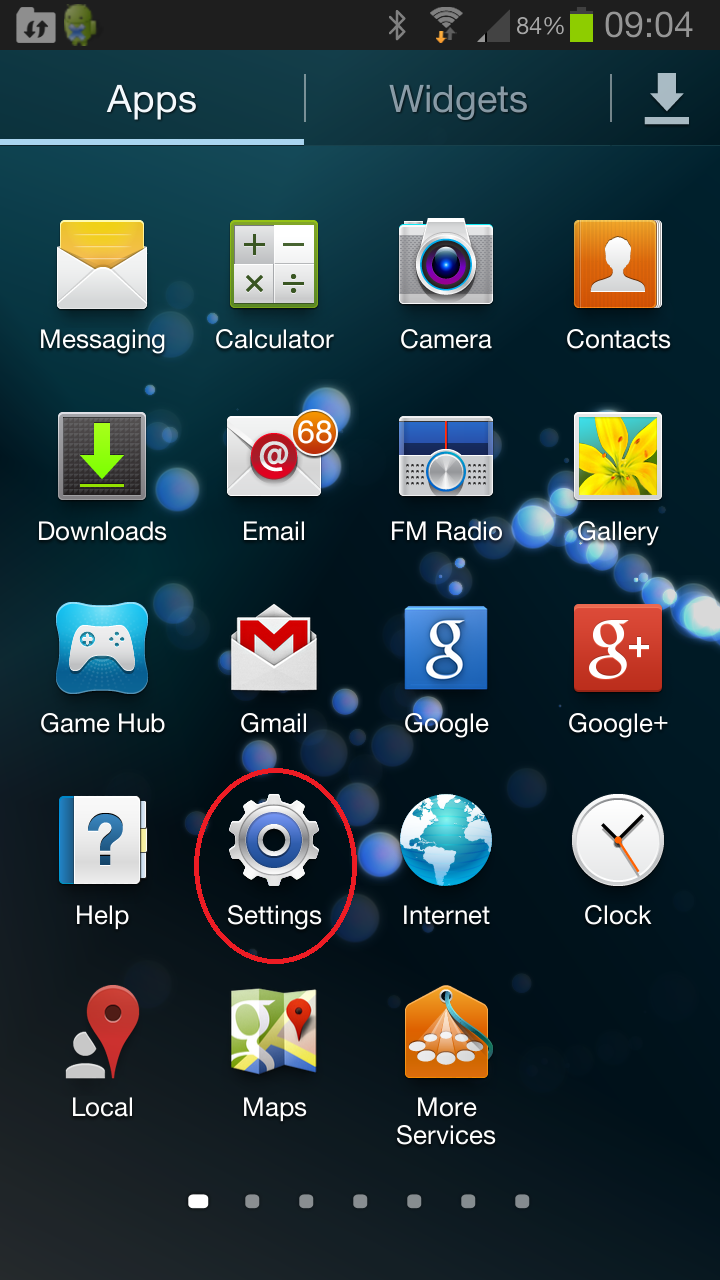
Once you have the files in place you import them. Go to the settings of your Android device.
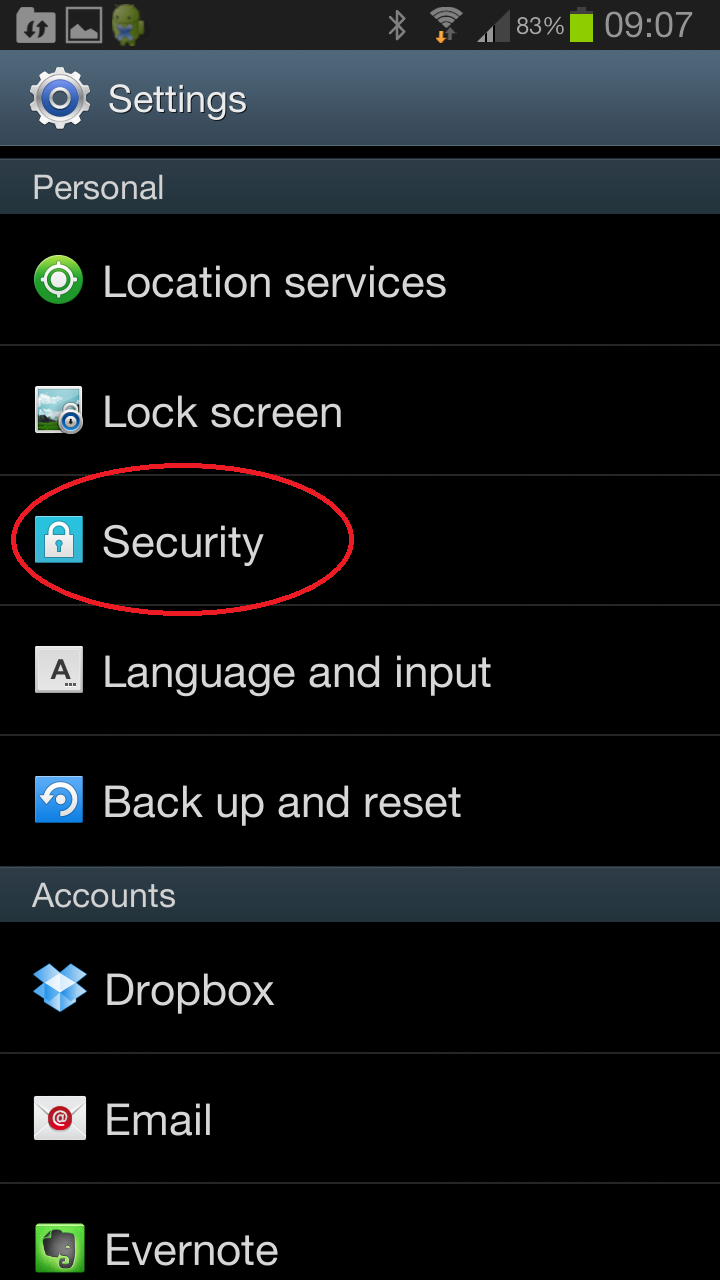
Select the Security option from the Settings menu.
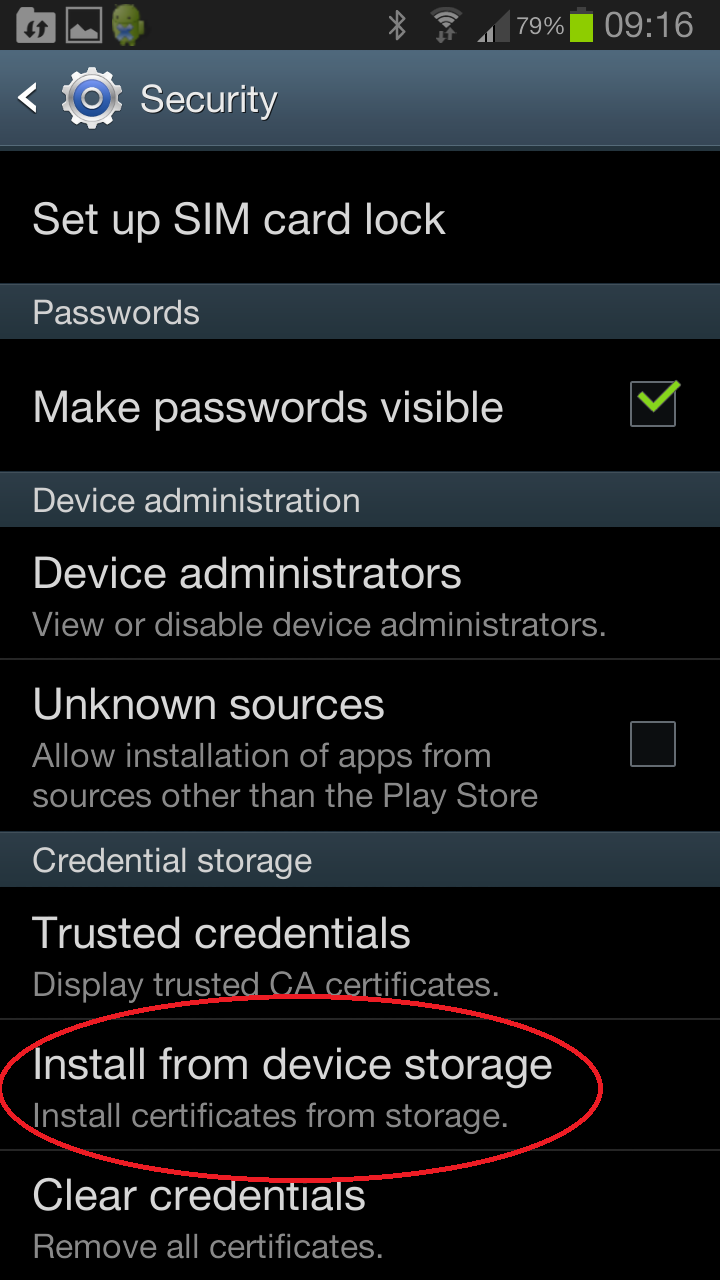
At the bottom you will find the Credentials storage. Select Install from storage device.
Your Android device will find the certificate files on your storage device and prompt you with the following screen.
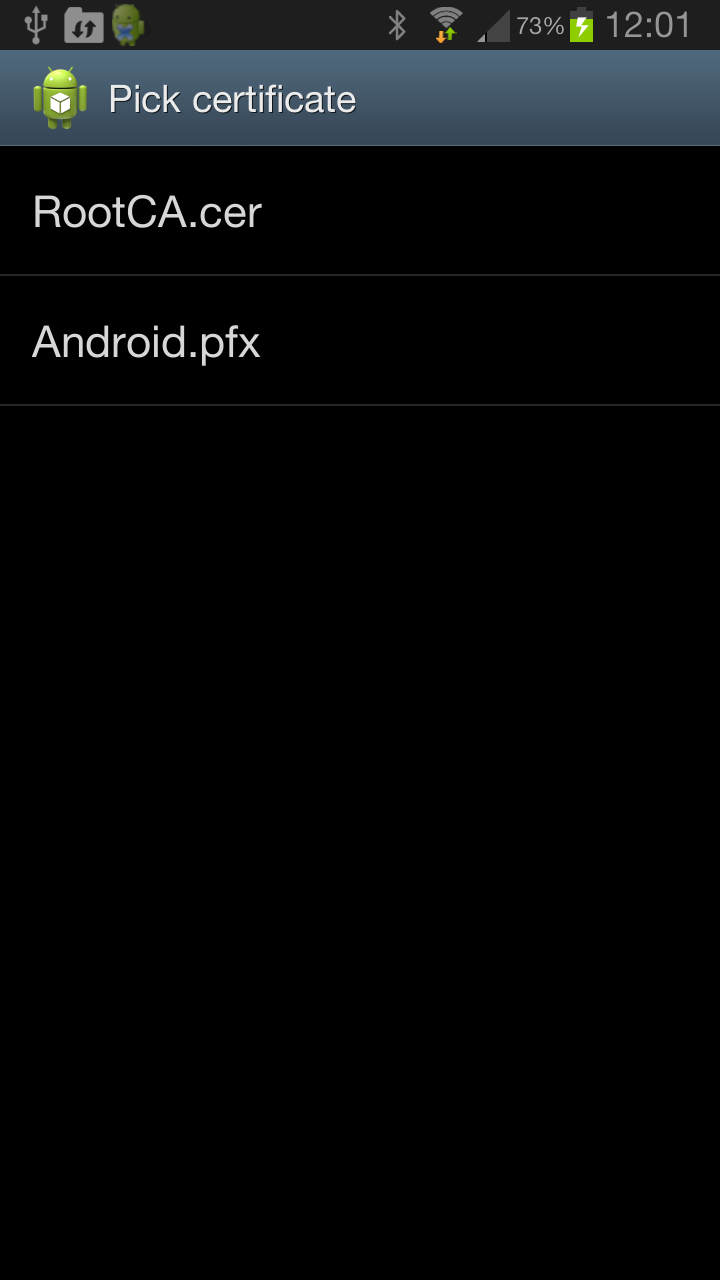
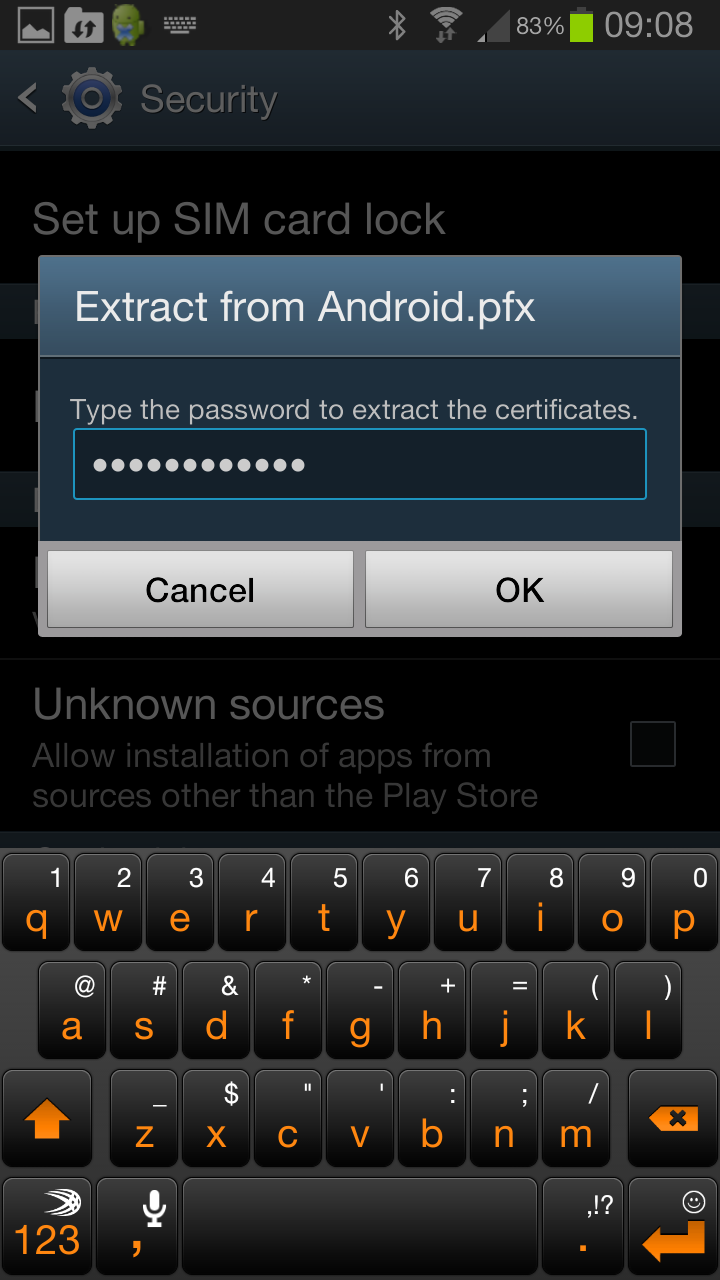
We need to install both, let me give you an example of the user certificate. Type in the password for the private key and hit OK.
In case you get the error “No certificate file found on SD card” then A) your Android device doesn’t support the file format for the certificates that you copied or B) you copied the certificates to the wrong storage device.
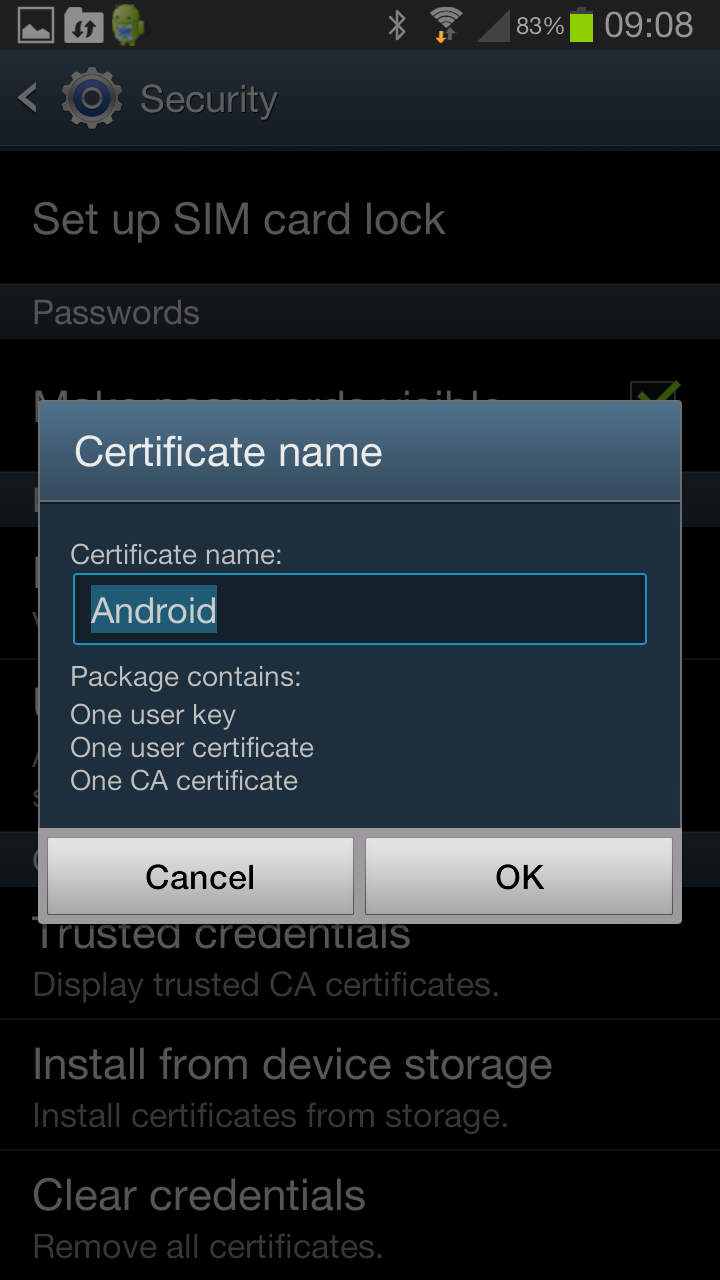
Android will ask you for a certificate name. Keep the default or rename it to something else and press OK.
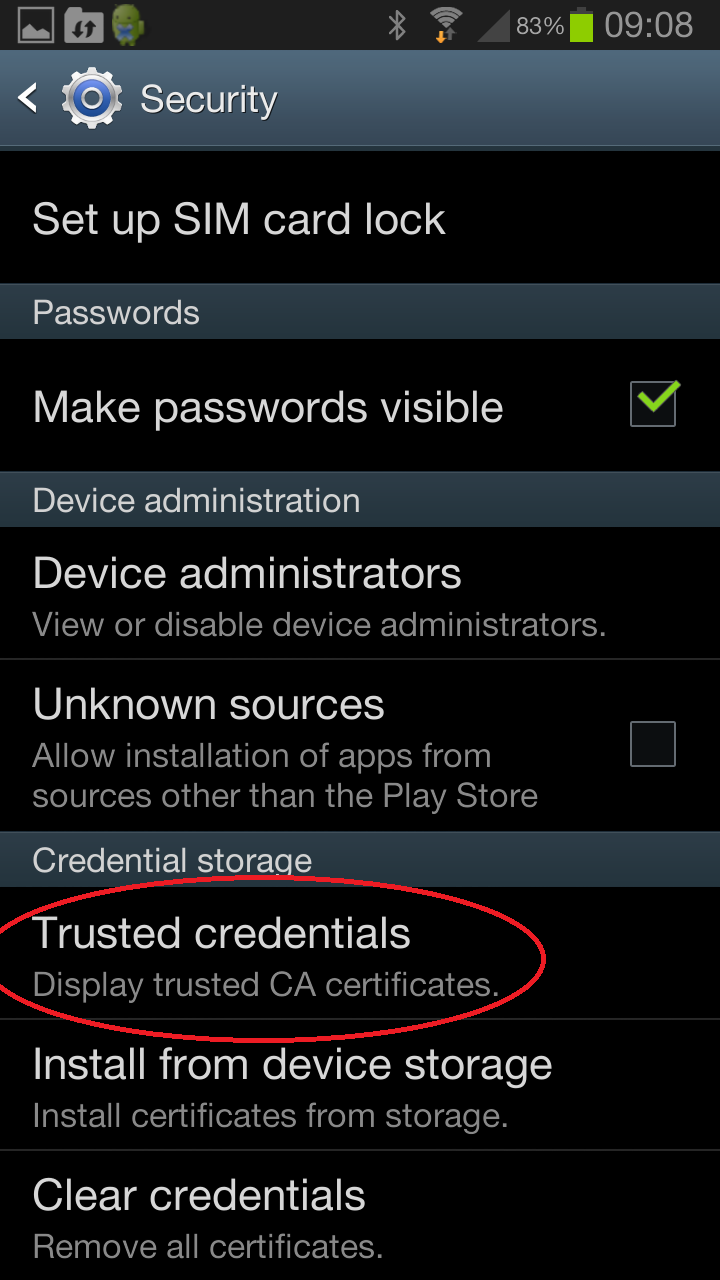
Make sure you import both certificates. You can verify that your Android device recognizes the certificates. Select Trusted credentials if you want to take a look.
 username
Below you can see that this Android device has a user certificate.

Our Android device now knows about the certificates that we require. Time to connect to the wireless network!
Connect to Wireless Network using EAP-TLS
With the certificates in place we are ready to connect to the Wireless Network. Go to the Wifi settings of your android device and connect to the correct SSID. You will be prompted for some security details. Enter the following items:
- EAP method: TLS
- Phase 2 authentication: none
- CA certificate: your root CA.
- User certificate: your user certificate.
- Identity: username
Leave the rest of the items empty and press Save.

You should now be connected to the wireless network:
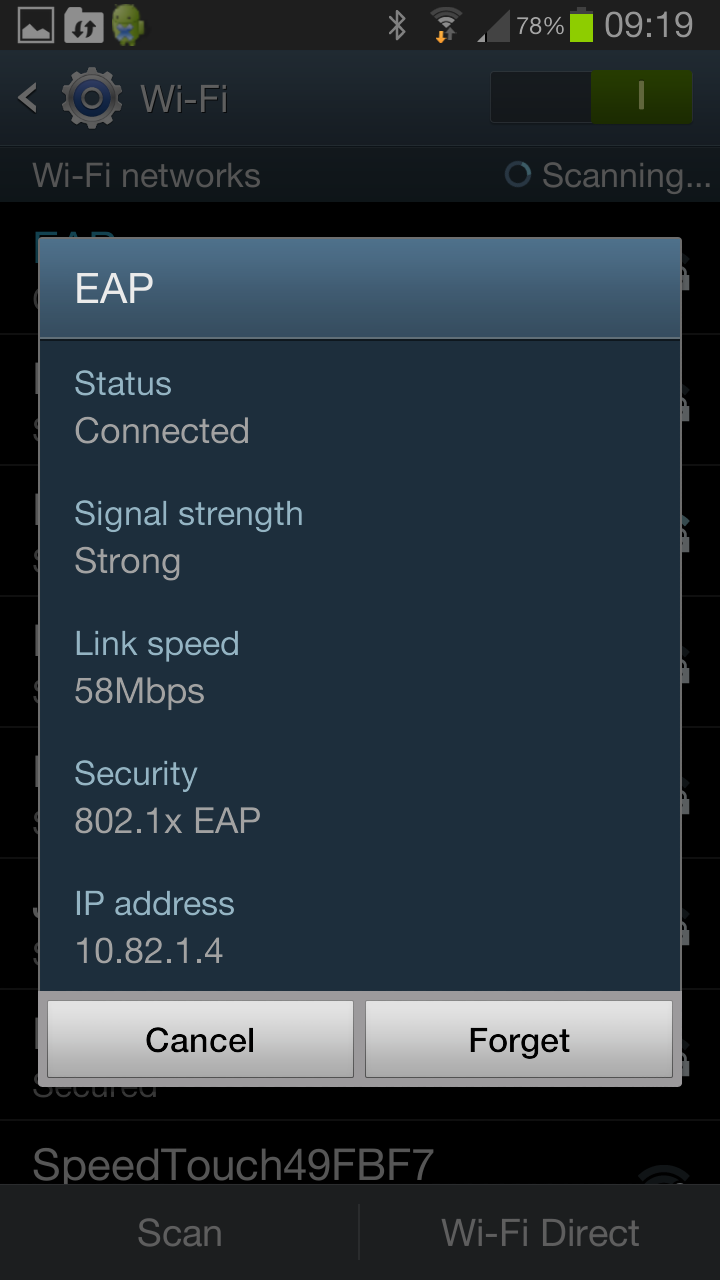
That’s all there is to it! I hope this has been helpful to help you connect your Android devices to the Wireless network using EAP-TLS. If you have any questions feel free to leave a comment!
Read more: http://networklessons.com/wireless/eap-tls-certificates-for-wireless-on-android/#ixzz3Jh1dCEgl


文章评论 (2)